
Access Groups
Access groups let you organize members into logical collections and control which pages they can view. Use groups to simplify access management—instead of configuring permissions for individual members, assign members to groups and control access at the group level.
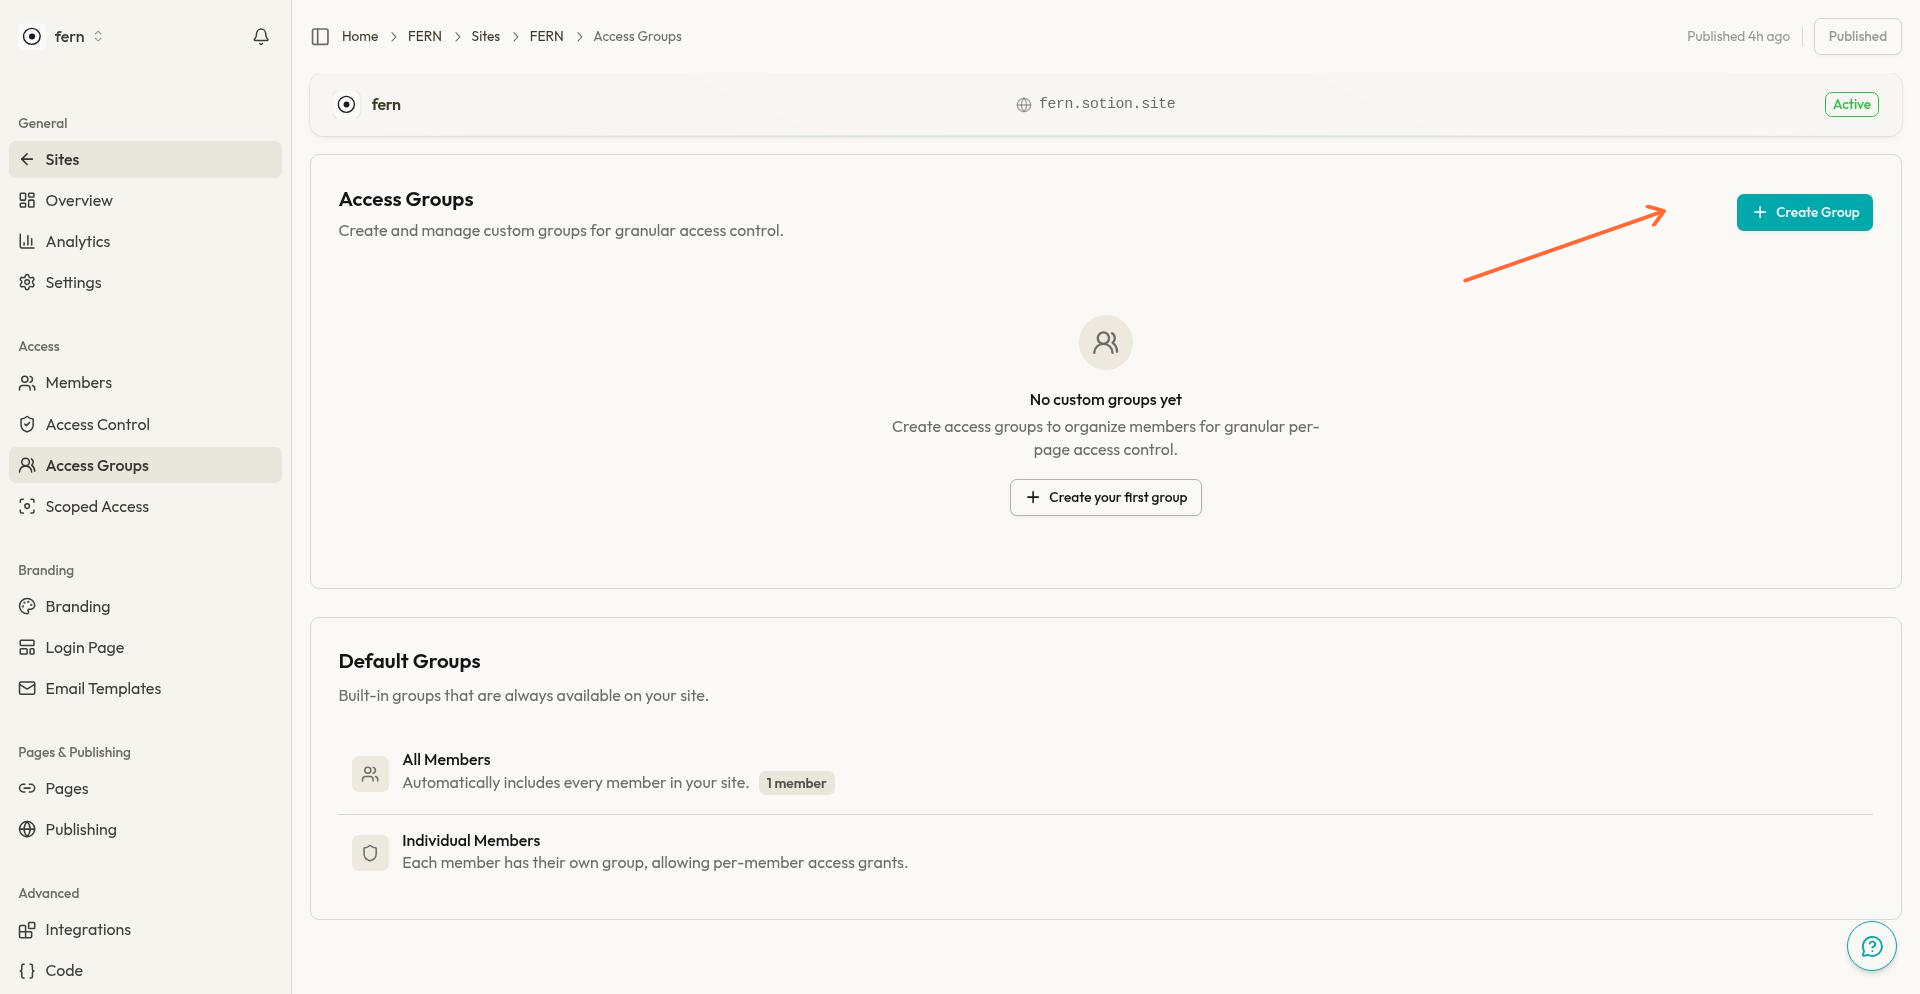
The Access Groups page displays all groups for your site and provides tools to create, edit, and manage group membership.
Access groups are a Pro+ feature. Starter and Basic plans don't include group-based access control. If you're on a lower plan, the page displays a billing prompt instead of the management interface.
Access the Access Groups Page
From your site dashboard, navigate to Access Groups in the sidebar. The page shows two sections:
Custom Groups — Groups you create and manage
Default Groups — Built-in groups available on every site
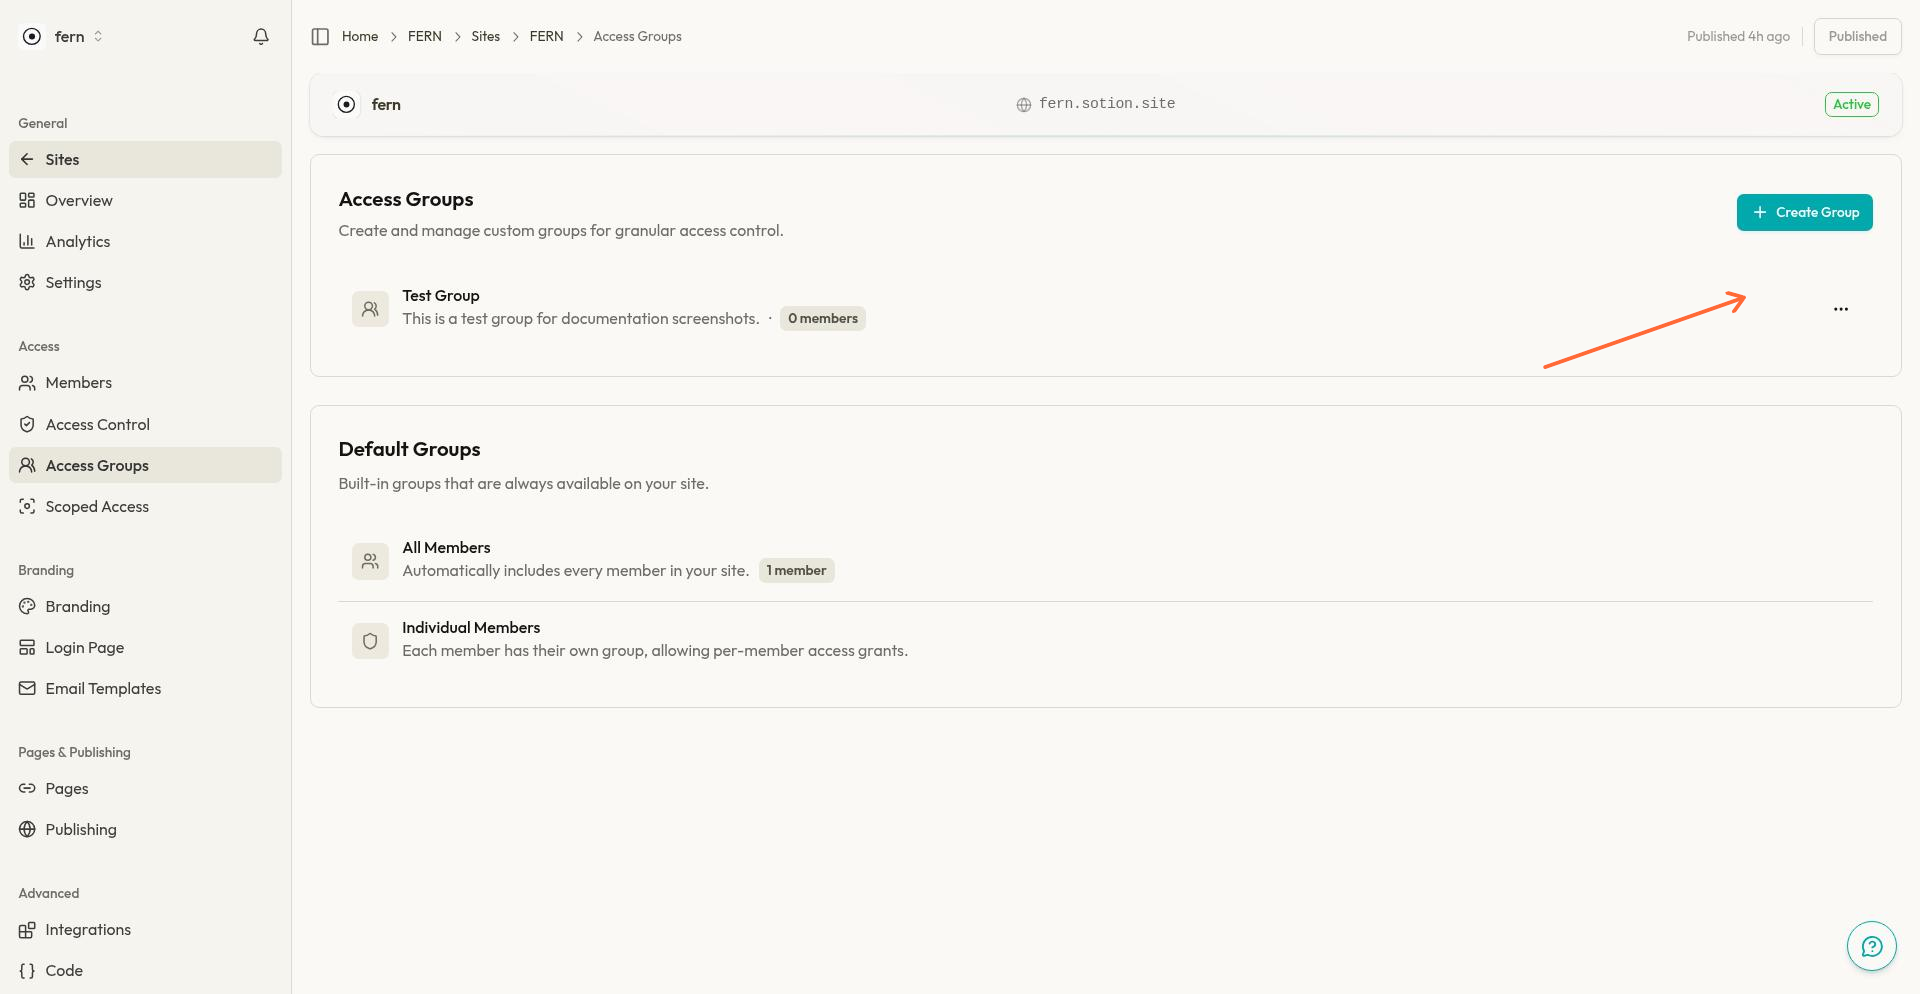
Default Groups
Every site includes two default groups that can't be edited or deleted:
All Members
This group automatically includes every registered member on your site. When you use Sign Up / Login or Invite Only access control, All Members is always included—every authenticated member gets access to pages protected this way.
The member count badge shows your total registered members.
Individual Member
This built-in group enables per-member access grants. When configuring page access, select Individual Member to choose specific members who should have access, rather than entire groups. This is useful for one-off access grants without creating a dedicated group.
Individual Member groups appear automatically in the Access Control group picker when you need to grant page access to specific members.
Create a Custom Group
Custom groups let you organize members into meaningful categories—by client, by subscription tier, by team, or any other grouping that matches your access control needs.
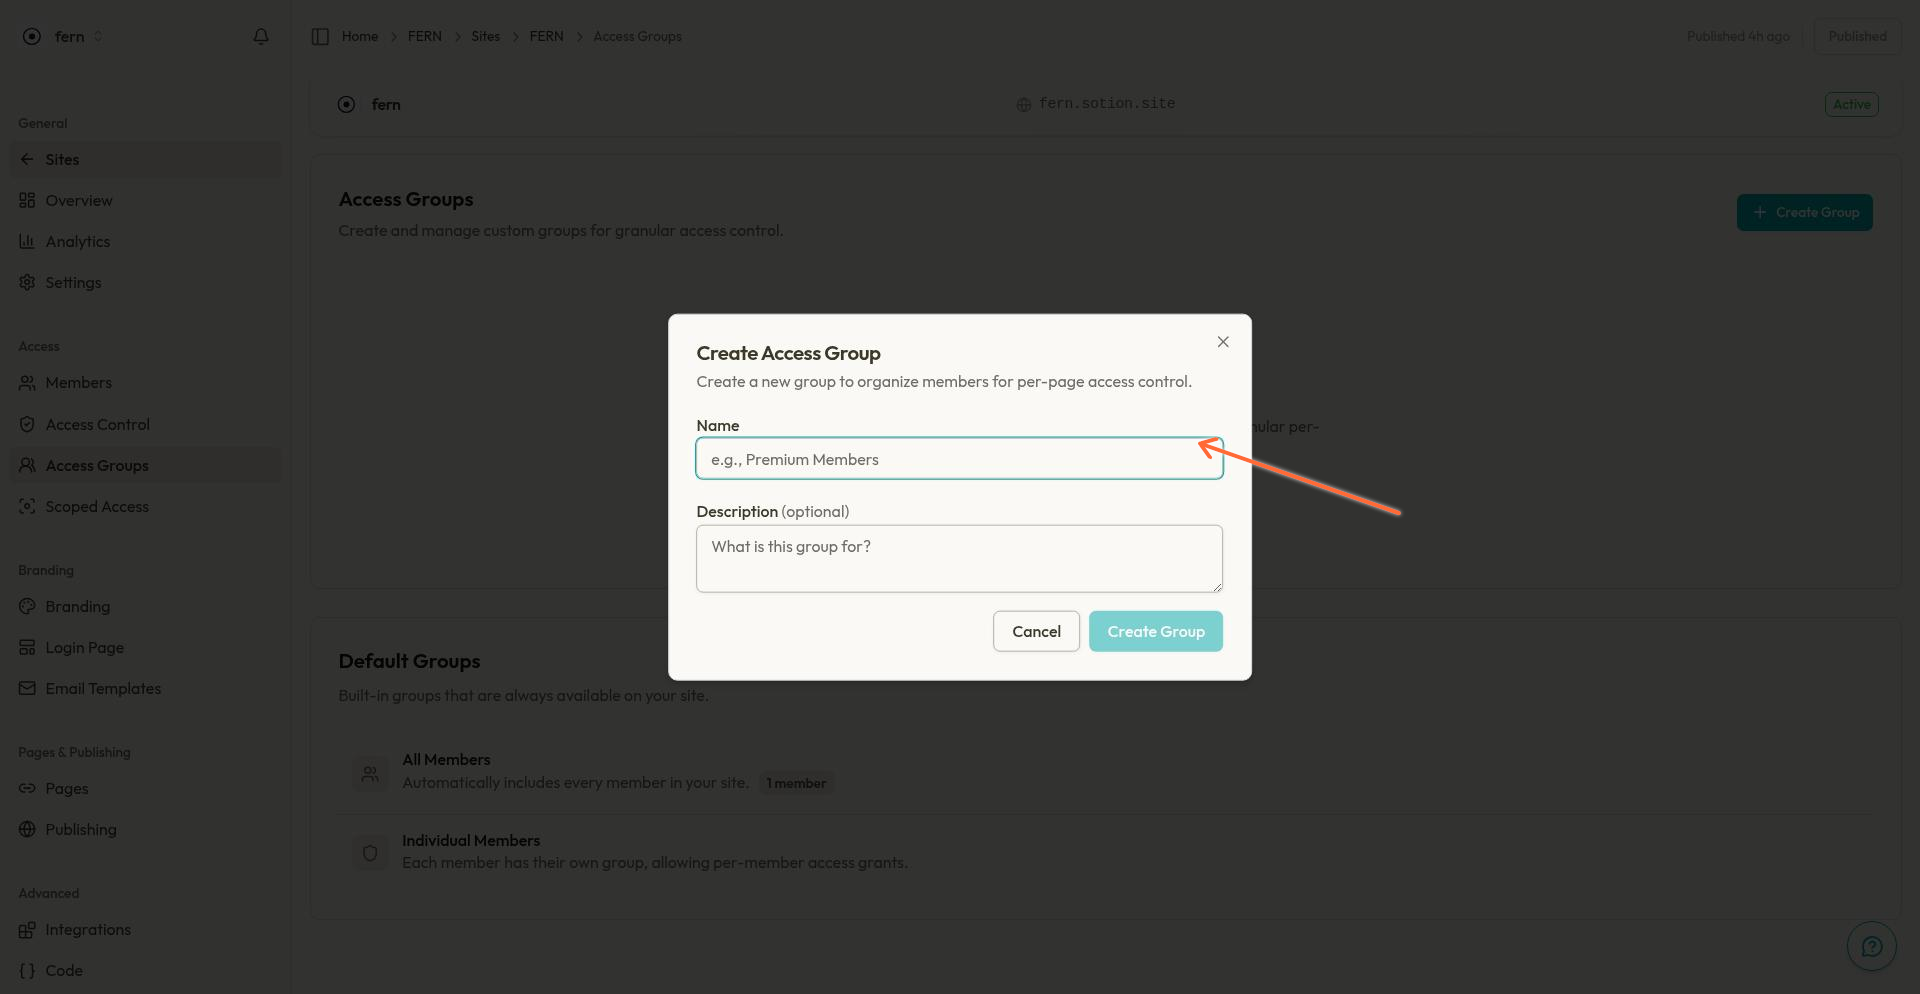
Click Create Group at the top of the page.
Enter a Name for the group. Choose something descriptive that reflects who the members are or what access they should have.
(Optional) Add a Description to document the group's purpose. Descriptions help your team understand group usage over time.
Click Create Group to save.
The new group appears in your custom groups list. Initially, it has zero members—use the manage members flow to add people.
Manage Group Members
Add or remove members from any custom group to control their page access. Members can belong to multiple groups simultaneously.
Open the Member Management Dialog
Click the overflow menu (three dots) on any group card.
Select Manage Members.
The dialog shows your current group membership and provides tools to modify it.
Add Members with Checkboxes
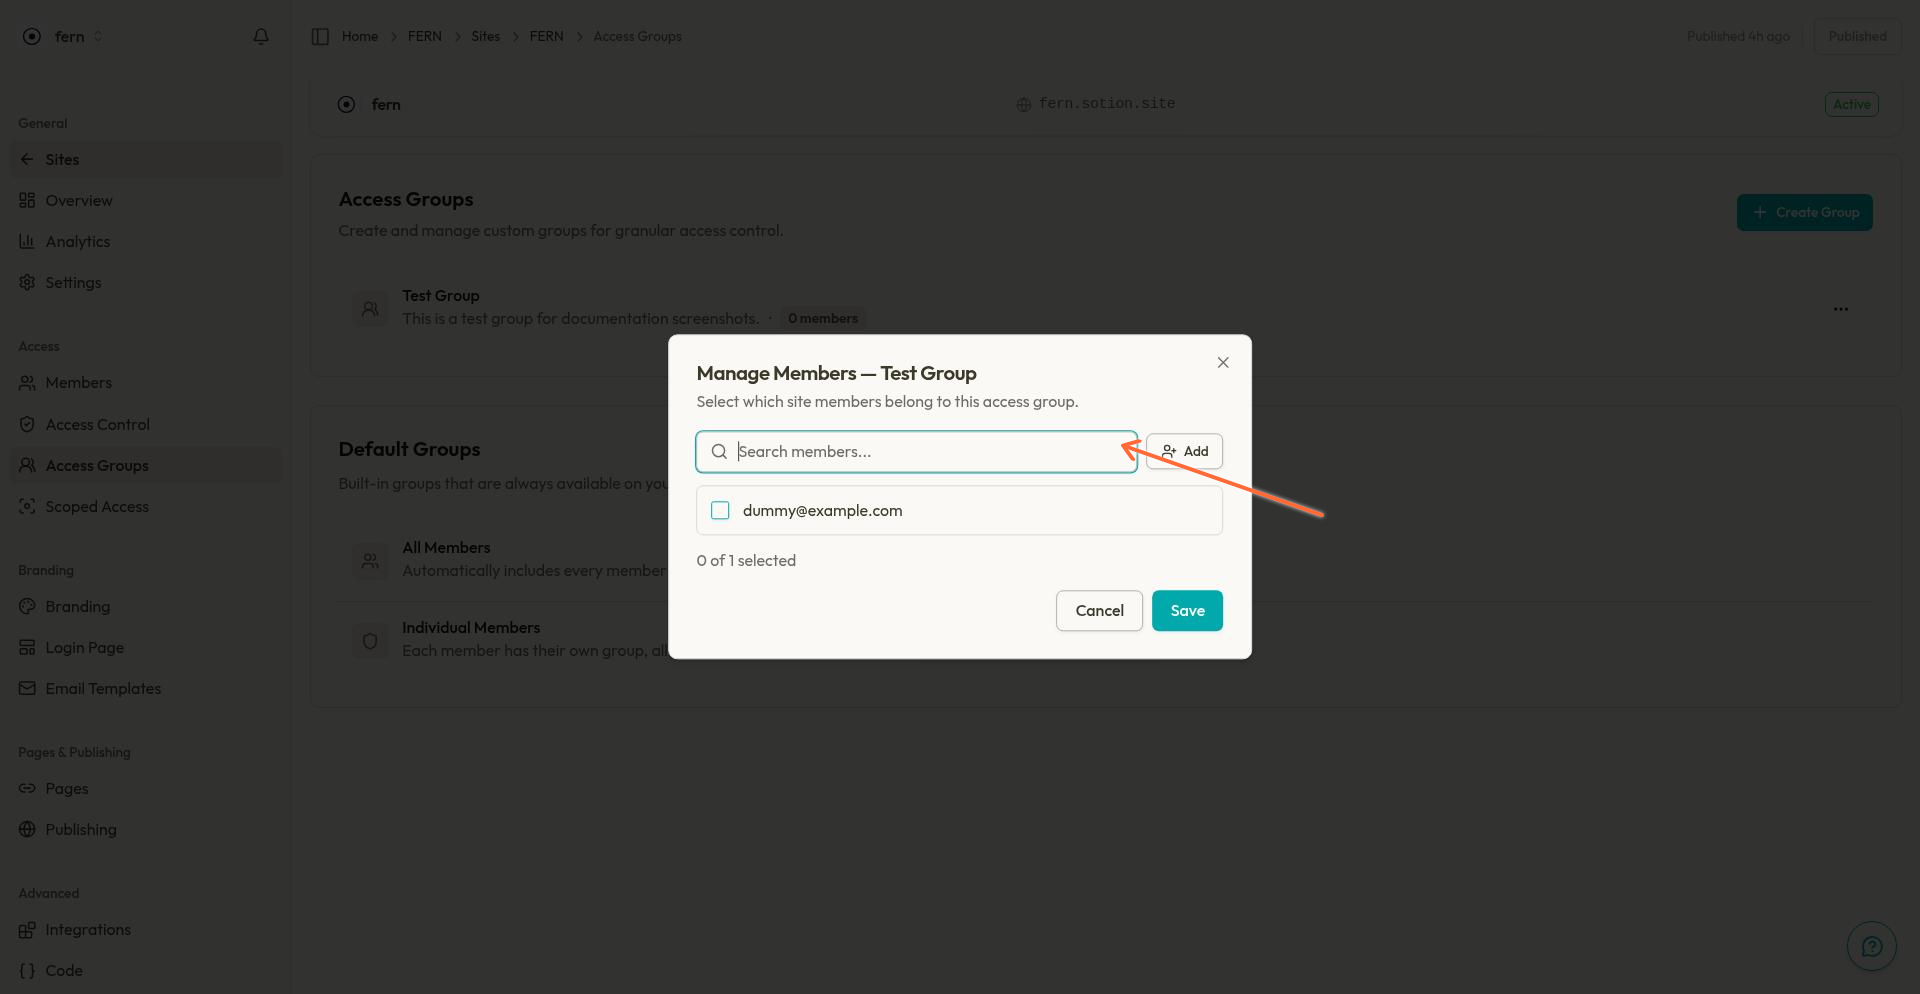
The main view lists all site members with checkboxes:
Use the Search members... field to filter the list by email address.
Check or uncheck members to add or remove them from the group.
The summary at the bottom shows X of Y selected to track your changes.
Bulk Add by Email
For quickly adding many members, use the bulk email entry option:
Click Add in the member management dialog.
Enter email addresses in the textarea. Separate emails with commas, spaces, or new lines—you can paste a list directly from another source.
Click Add to group.
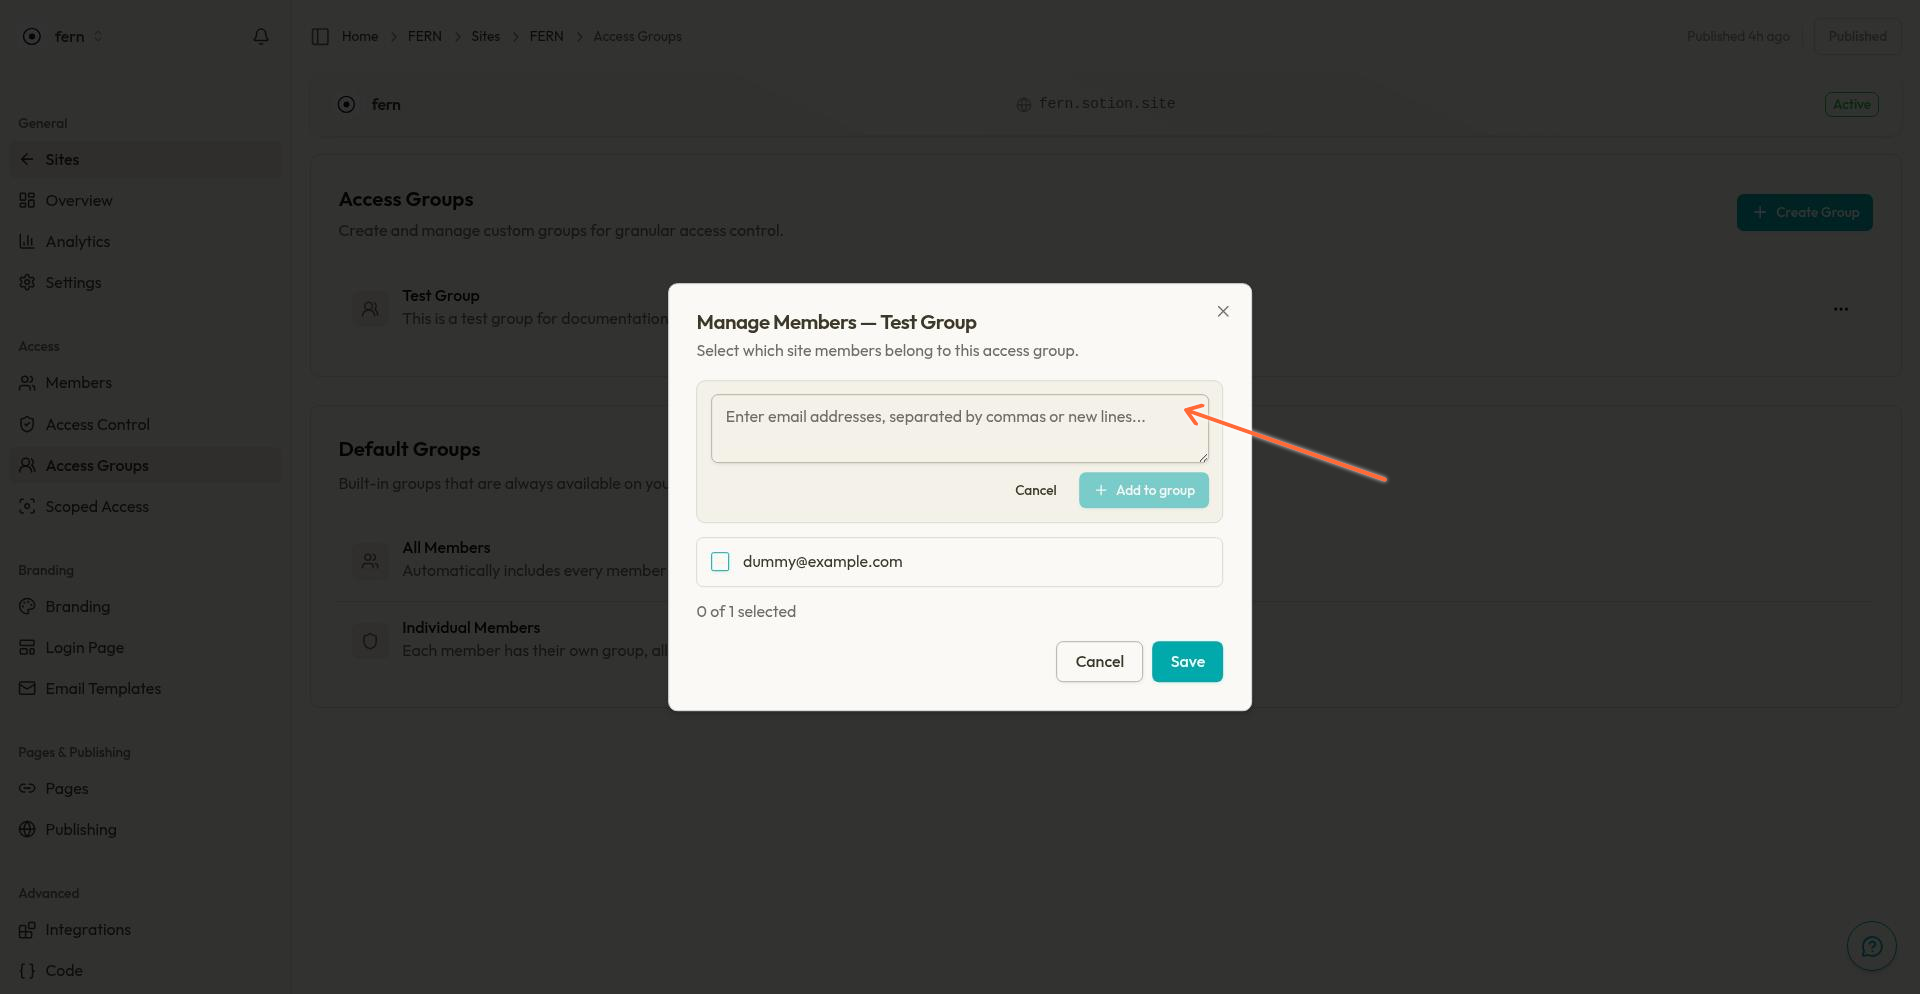
The dialog validates each email and adds valid addresses to the group. Invalid emails are highlighted for correction.
Save Your Changes
Click Save to apply your member changes. The group card updates to show the new member count.
Edit Group Details
Rename a group or update its description at any time:
Click the overflow menu (three dots) on the group card.
Select Edit.
Update the Name and/or Description.
Click Save Changes.
Renaming a group doesn't affect its members or page access assignments—the group keeps its existing configuration under the new name.
Delete a Group
Deleting a group removes it permanently and affects both member assignments and page access:
Click the overflow menu (three dots) on the group card.
Select Delete.
Review the warning message carefully.
Confirm the deletion.
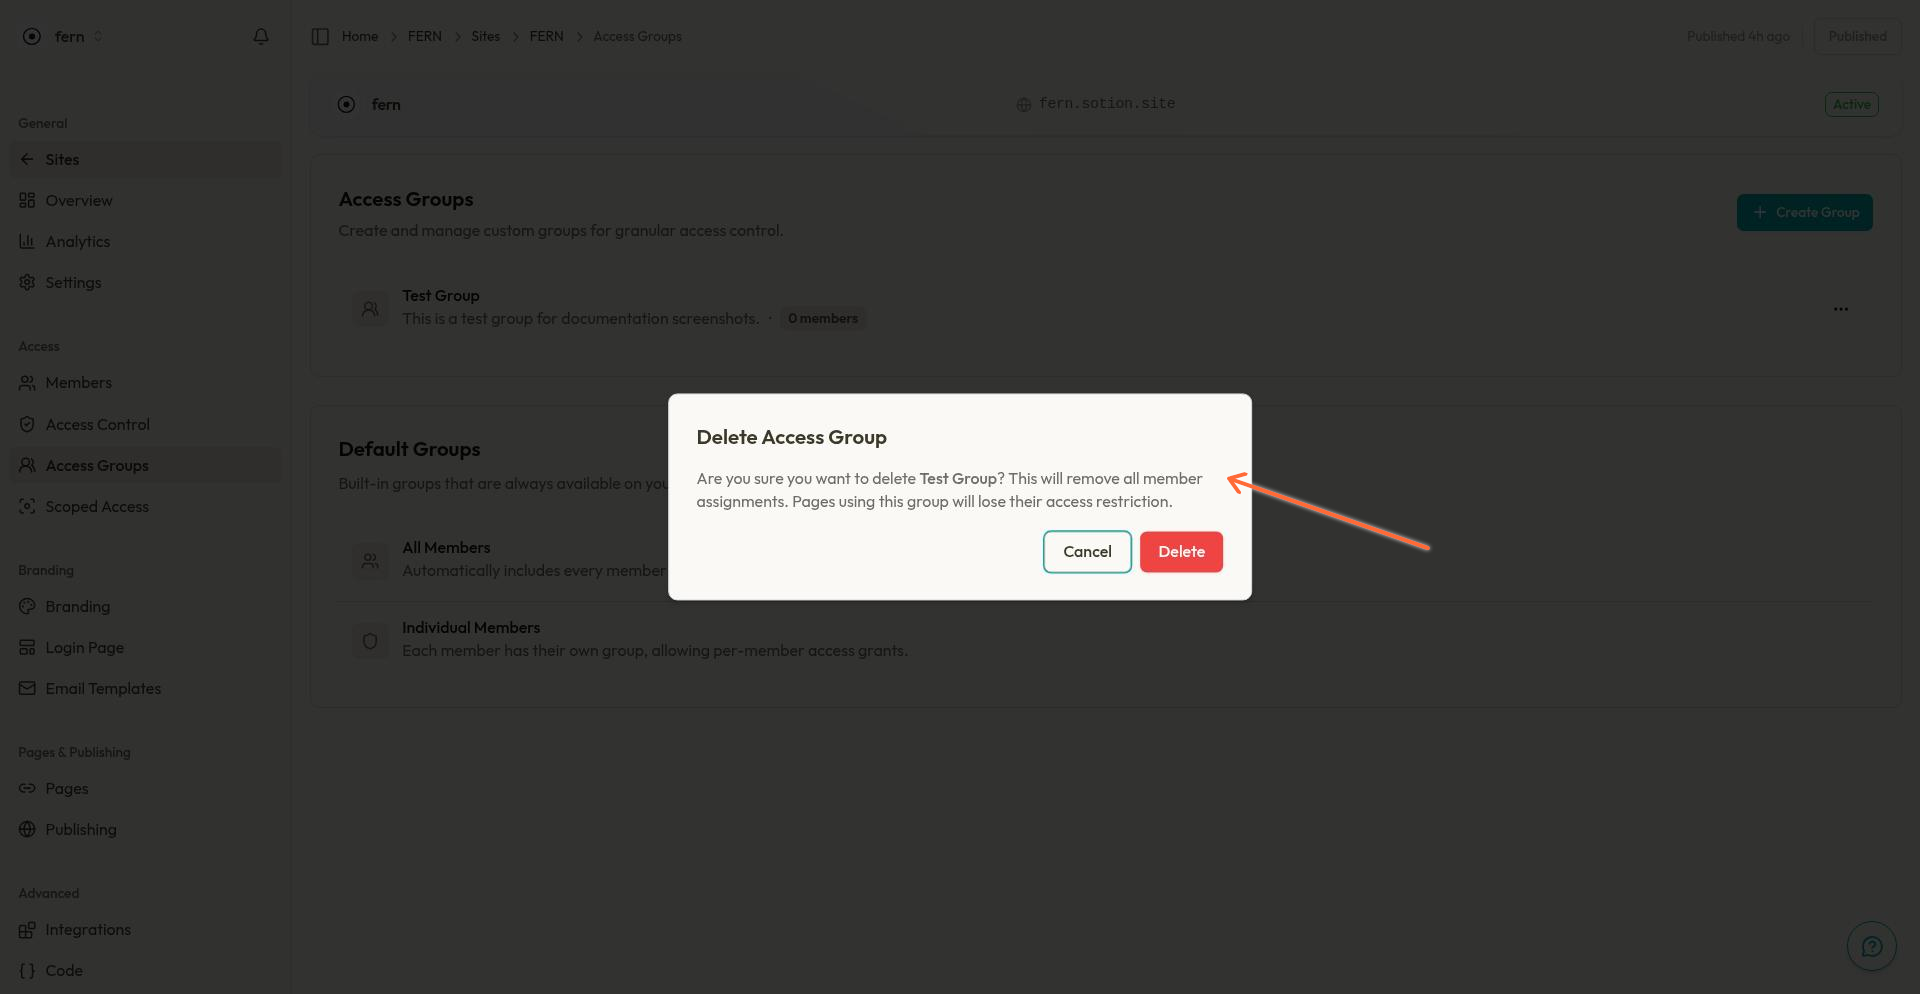
Deleting a group removes all member assignments. Any pages using this group for access control will lose that restriction—members who previously needed the group will no longer be required. Review your Access Control settings before deleting groups that are actively in use.
How Groups Work with Access Control
Access groups are used in two places:
Page Access Control
When configuring Sign Up / Login or Invite Only access on a page, you select which groups can access it. Only members in those groups can view the protected content. See Access Control for details on configuring page-level restrictions.
Page Visibility
Use Group Only visibility to show different pages to different groups—enabling scoped access where members see different content based on their group membership. See Scoped Access to learn more.
Creating Groups from Other Pages
You don't need to visit the Access Groups page to create new groups. Groups can be created inline from:
The Add Members dialog when adding new members
The Edit member dialog when modifying member properties
The groups popover on member rows
The access groups picker in Access Control
Inline creation is useful when you're already working in Member Management or Access Control and need a new group without navigating away.
Manage Groups via API
Access groups can be created, updated, and deleted programmatically using the REST API:
POST /api/v1/access-groups— Create a new groupGET /api/v1/access-groups— List all groupsGET /api/v1/access-groups/{groupId}— Get a single groupPATCH /api/v1/access-groups/{groupId}— Update group detailsDELETE /api/v1/access-groups/{groupId}— Delete a groupPOST /api/v1/access-groups/{groupId}/members— Add members to a groupDELETE /api/v1/access-groups/{groupId}/members/{memberId}— Remove a member
See the API Overview for authentication and usage details.
Related Articles
Access Control — Configure page-level authentication and visibility
Member Management — Add, edit, and organize site members
Scoped Access — Show different pages to different members
Access Control Overview — Understand how membership features work together